How to Build a Wooden Sofa Table: Step-by-Step Guide
The easiest way to build a sofa table out of wood is to cut four legs, attach side aprons, add a stretcher for support, and top it all with a sturdy tabletop. A few hours and some basic tools are all you need. Yes, really — this is one of the friendliest beginner woodworking projects out there.
We researched dozens of build plans and found that most DIY sofa tables use pine or poplar, cost under $100 in lumber, and only need a saw, drill, and wood glue. Many experts say a slim table behind your couch is also one of the best ways to add storage and style to a small living room. Think of it as a console table that finally gives your remotes and coffee mug a proper home.
TL;DR
- Pick simple wood like pine — it’s cheap and easy to work with.
- Standard size is about 30 inches tall, 12 inches deep, and as long as your sofa. Our guide to sofa table length explains exactly how long yours should be relative to your couch.
- You’ll need a saw, drill, wood glue, screws, and sandpaper.
- Cut the legs and aprons first, then assemble, then attach the top.
- Sand, stain or paint, and seal before you show it off.
Below, we walk you through every step of building your own sofa table, from picking lumber to the final coat of finish. Grab your tape measure — let’s get building.
Building a Sofa Table From Wood, Step by Step
The whole build comes down to four steps: measure and cut, build the frame, attach the top, then finish. We found that most first-timers finish in one weekend afternoon. Take it slow, and your table will turn out great.
Step 1: Pick Your Wood and Gather Materials
Pine is your best friend here. It’s cheap, light, and forgiving if your cuts aren’t perfect. Poplar is a step up if you plan to paint, since it has fewer knots. Many woodworkers suggest avoiding soft woods like cedar for table legs, because they dent easily (Fine Woodworking).
For a standard table, you’ll need:
- Four legs: 2×2 or 2×4 boards, about 29 inches long each
- Two long aprons: 1×4 boards cut to your table length minus 4 inches
- Two short aprons: 1×4 boards cut to about 9 inches
- One stretcher: a 1×4 to connect the long aprons
- Top boards: one 1×12 board, or two narrower boards joined
Don’t forget pocket hole screws, wood glue, and sandpaper in 120 and 220 grit. Total lumber cost usually lands between $40 and $80 at big-box stores.
Step 2: Measure and Cut Everything First
Measure twice, cut once — the old saying exists for a reason. Write your cut list on scrap wood or paper before the saw comes out.
Getting the Height Right
Aim for a finished height of about 30 inches. Since your top adds roughly 1 inch of thickness, cut legs at 29 inches. That keeps the table level with your sofa’s back cushions.
Making Clean Cuts
A miter saw gives the straightest cuts, but a circular saw works fine with a straightedge guide. Mark your line with a pencil and square, then cut just outside the line. You can always sand down to it — you can’t glue wood back.
Step 3: Build the Frame
The frame is the skeleton of your table. Get this square, and everything else falls into place.
Start by drilling pocket holes into the aprons. These angled holes let you screw the aprons to the legs cleanly, with no visible hardware. If you don’t own a pocket hole jig, simple L-brackets from the hardware store work too — just a little less tidy.
Glue each joint first, then drive screws. Glue does most of the real work over time; screws just hold things while it cures.
Checking for Square
Measure diagonally from corner to corner, both ways. If the two numbers match, your frame is square. If they don’t, press gently on the long diagonal until they do. Think of it as straightening a picture frame on a wall.
Step 4: Add the Stretcher for Strength
Connect the two long aprons with a stretcher, placed a few inches below the top. This stops the legs from wobbling side to side. We found that skipping this step is the number one reason DIY tables wobble after a month. One centered stretcher is plenty for a table 12 inches deep.
Step 5: Attach the Tabletop
Lay your top board face down, then set the frame on top of it. Center it with an even overhang on all sides — about half an inch looks tidy.
Screw up through the aprons into the underside of the top. Use screws long enough to bite but not poke through. If your top is made of two boards, glue them edge to edge first and clamp until dry.
Here’s a pro trick we kept seeing in build plans: drill the screw holes in the aprons slightly oval, or just snug but not overly tight. Wood expands and contracts with humidity changes, and a rigid top can crack over time (USDA Forest Products Laboratory).
Step 6: Sand, Fill, and Smooth
Start with 120-grit sandpaper to knock down rough spots, then finish with 220 for a silky feel. Always sand with the grain, never against it. Fill any screw holes with wood filler if you plan to paint.
Wipe the dust off with a barely damp cloth. Then run your hand across the surface. Feel any rough patch? Sand it again. Your future self, resting a coffee mug on that spot, will thank you.
Step 7: Finish It Your Way
Stain, paint, or clear coat — there’s no wrong answer, only your answer.
| Finish | Best For | Dry Time |
|---|---|---|
| Stain plus polyurethane | Showing off wood grain | 24 hours per coat |
| Paint plus topcoat | Color matching your room | 1–2 hours per coat |
| Clear oil finish | A natural, rustic look | Reapply yearly |
Whatever you choose, work in a well-ventilated space. Many finish products release fumes that bother your lungs and eyes, so open windows and consider a respirator mask (OSHA).
Final Safety Checklist Before You Start
Before the first cut, run through this list. We found that a quick check prevents most workshop mishaps.
- Safety glasses on before any saw or drill use.
- No loose sleeves, jewelry, or drawstrings near spinning blades.
- Clamp your work down — never hold a board with your hand near the blade.
- Keep your work area lit and free of trip hazards.
- Unplug tools when changing blades or bits.
- Take a break if you’re tired; rushed cuts cause most injuries (CDC).
Easy Style Upgrades Once the Build Is Done
Want to make it look less “first project” and more “boutique furniture”? Small touches go a long way.
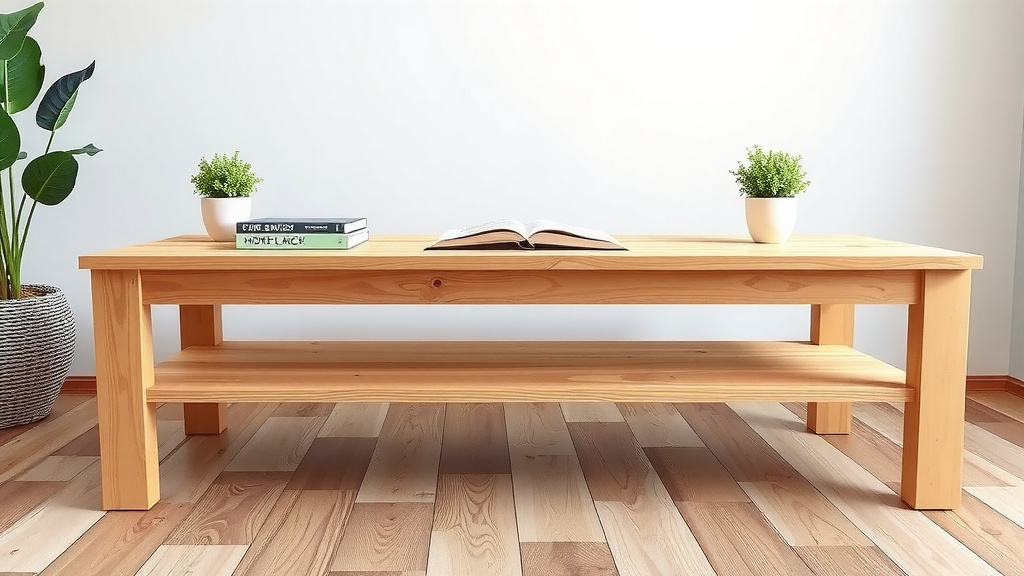
Try a chamfer — a small angled cut — along the top edges for a softer look. Round over the leg corners with sandpaper for the same effect. Adding a lower shelf between the stretchers gives you bonus storage for books or baskets, and it only takes four more screws.
Some builders also add hairpin legs or paint just the legs for a two-tone look. Honestly, once the structure is solid, the fun part is making it yours. So, what color are you thinking?
Conclusion
Building a sofa table out of wood comes down to patient measuring, a square frame, and a finish that suits your space. We’ve found that pine keeps the budget friendly, pocket holes keep the joints clean, and a stretcher keeps the legs steady for years. None of it requires fancy tools or expert skills — just a free afternoon and a willingness to double-check your cuts. Even a slightly imperfect table will beat store-bought, because you built it. So sketch your cut list tonight, pick up the lumber this weekend, and make that first cut. Your living room is waiting.
Frequently Asked Questions
How much does it cost to build a sofa table?
Most basic builds run between $40 and $80 in lumber, plus another $20 or so for screws, glue, and finish. Your total stays well under $150 unless you upgrade to hardwood. That’s usually cheaper than a decent store-bought console table.
Can I build a sofa table without a pocket hole jig?
Absolutely. Metal L-brackets or corner braces screw into the inside of the aprons and hold everything together just fine. The joints look a little less polished, but nobody will see them once the top is attached.
What’s the best wood for a beginner’s sofa table?
Pine is the most forgiving — it’s soft, cheap, and easy to fix if a cut goes sideways. Poplar is worth the small upgrade if you plan to paint, since it sands smoother and has fewer knots. Save hardwoods like oak for a later project.
How do I stop my DIY sofa table from wobbling?
Wobble usually means the frame isn’t square or a stretcher is missing. Check your diagonal measurements and adjust until they match. Also make sure the table sits on a flat floor — sometimes a felt pad under one leg is all you need.
How long should a sofa table be compared to my couch?
We found that a table roughly the same length as your sofa, or a few inches shorter, looks most balanced. If your couch is 84 inches wide, a 60 to 72 inch table works nicely. Too short looks like an afterthought; too long crowds walkways. Our guide to sofa table length behind a couch breaks down the two-thirds rule with more examples.