How to Build a Patio Sofa: Step-by-Step DIY Guide
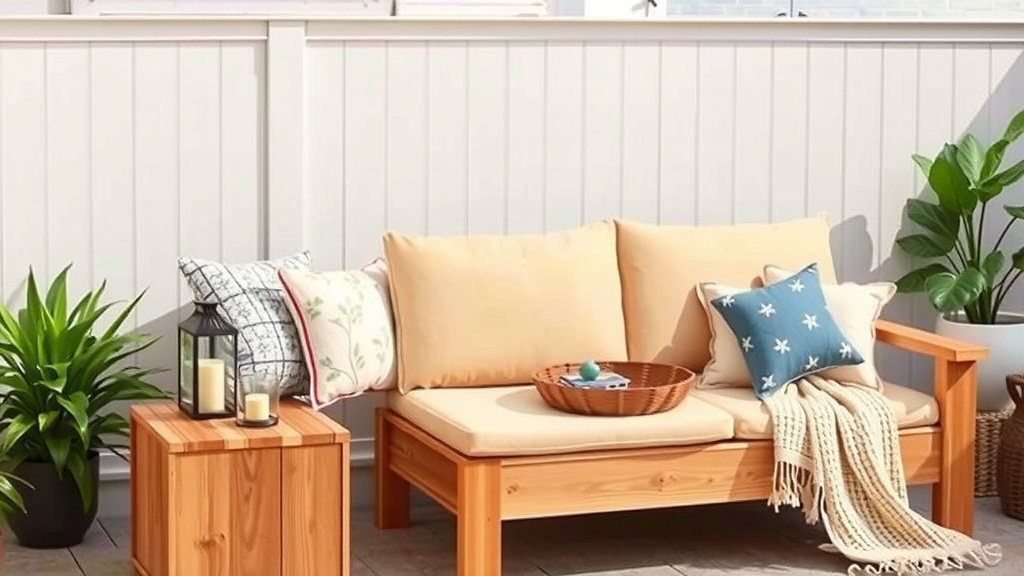
To build a patio sofa, start by framing the base from weather-resistant lumber like cedar or pressure-treated pine, then add side rails, a backrest, and outdoor-rated cushions on top. With basic tools and a good plan, most DIYers can finish one in a weekend. No fancy woodworking skills required.
Why buy a $1,500 outdoor sofa when you can build your own for a fraction of the cost? We researched popular plans and found that a DIY patio sofa typically runs $150 to $400 depending on wood and cushions. Plus, you get to pick the exact size, style, and fabric that fits your space. Many experts say cedar and redwood are the best choices because they handle rain and sun without rotting quickly.
- Pick weather-resistant wood like cedar, redwood, or pressure-treated pine.
- Cut your frame pieces, then assemble the base, seat, and backrest with exterior screws.
- Sand everything smooth and seal it with an outdoor finish.
- Add weatherproof cushions and throw pillows for comfort.
- Most builds cost $150 to $400 and take about a weekend.
Below, we walk through the whole process step by step, from picking lumber to fluffing the final cushions. Grab a coffee, and let’s build something you’ll actually want to nap on.
Building a DIY Patio Sofa Step by Step
Ready to get your hands sawdusty? Here’s the full build, broken into bite-size chunks. Follow it in order and you’ll avoid the mistakes that trip up most first-timers.
Step 1: Choose Your Lumber
Cedar is the crowd favorite. It smells great, resists rot naturally, and won’t weigh a ton. Redwood works too, if you can find it near you. Pressure-treated pine is the budget pick, but it needs a good sealing job.
Buy 2x4s and 2x6s that are straight and dry. Give each board a quick eyeball test. If it looks like a banana, put it back.
Step 2: Cut Your Pieces
Most two-seat plans use about 8 to 10 boards total. You’ll cut pieces for the base frame, seat slats, side rails, arms, and backrest. Many free plans online list exact cut lengths, so let one do the math for you.
Cutting Tips That Save Headaches
- Measure twice, cut once. Cliché, but true.
- Label each piece with a pencil right after cutting.
- Cut all the same-length pieces in one stack to keep them identical.
- Set your saw blade depth slightly deeper than the board thickness.
Step 3: Assemble the Base Frame
Screw the front and back rails to the side rails using 3-inch exterior screws. Pre-drill your holes first so the wood doesn’t split. Check for square by measuring corner to corner both ways; matching numbers mean you’re golden.
Once the frame is square, add the center support. It keeps the seat from sagging when your uncle visits and claims the whole sofa.
Step 4: Attach Slats and Arms
Lay your seat slats across the frame with small gaps between them. Those gaps let rain drain instead of pooling. Space them evenly using a scrap block as a spacer, then screw each one down with two screws per side.
Arms come next. Attach the arm pieces to the sides with exterior wood glue and screws. The glue adds strength; the screws hold everything while it dries.
Step 5: Build and Angle the Backrest
A backrest that sits perfectly straight feels like sitting in a waiting room. Most plans angle it 10 to 15 degrees back for real comfort. Cut your backrest supports, test-fit them, then attach the back slats from the bottom up.
Lean back and test it before final tightening. Seriously. Your future napping self will thank you.
Sanding, Sealing, and Weatherproofing Your Sofa
Sanding isn’t glamorous, but skipping it means splinters in places you don’t want them. Start with 80-grit sandpaper, then finish with 120 or 150 grit. Round every edge you can reach. Round corners just feel friendlier.
After sanding, wipe off the dust and apply an exterior sealant or stain. Many experts recommend at least two coats on horizontal surfaces, since rain pools there first. Let each coat dry fully before the next one.
Sealer Options Compared
| Finish Type | Best For | Reapply Every |
|---|---|---|
| Exterior spar varnish | Full sun and rain exposure | 1–2 years |
| Semi-transparent stain | Cedar and pine, natural look | 2–3 years |
| Marine varnish | Harsh coastal weather | 1–2 years |
Picking Cushions and Fabrics That Last Outdoors
Indoor cushions outside are a tragedy waiting to happen. Look for outdoor-rated foam wrapped in solution-dyed acrylic fabric, like Sunbrella. It resists fading and mildew far better than regular fabric.
Measure your seat area before ordering. Add an inch or two of width for a plump, inviting look. Depth of 4 to 5 inches hits the comfort sweet spot for most people. Our guide to choosing the right sofa seat depth explains how to match depth to your height and sitting style.
Comfort and Safety Notes
Sit height matters more than you’d think. A seat 16 to 18 inches from the ground suits most adults and is easier on knees and hips (Mayo Clinic offers similar guidance on chair height for joint comfort). If anyone in your home has back issues, firmer foam is usually the better call.
Final Assembly Checklist
Before you call it done, run through this quick checklist:
- Every screw countersunk and no sharp edges exposed
- Frame still square after all assembly steps
- Two full coats of sealant, fully cured
- Backrest angle tested and locked in
- Cushions fit without overhanging awkwardly
- No wobble when you give it a firm push
Caring for Your New Outdoor Sofa
A little maintenance goes a long way. We found that most DIY builds last years with just a seasonal once-over. Here’s the routine:
- Hose off dust and pollen every few weeks during heavy use.
- Wipe spills quickly so they don’t stain the wood or fabric.
- Store or cover cushions during long rainy stretches.
- Reapply sealant every year or two, based on your climate.
- Tighten any loose screws at the start of each season.
Live somewhere with brutal winters? Move the sofa into a garage or shed if you can. Wood that freezes wet is wood that cracks.
Budget Breakdown: What You’ll Actually Spend
Wondering where the money goes? Here’s a typical cost breakdown for a two-seater:
| Item | Typical Cost |
|---|---|
| Cedar or pine lumber | $75–$150 |
| Screws, glue, sandpaper | $25–$40 |
| Sealant or stain | $20–$35 |
| Outdoor cushions | $80–$250 |
Already own a drill and a saw? You’re most of the way there on tools. Borrowing the rest keeps your total even lower.
Common Mistakes (and Easy Fixes)
Everyone botches something on a first build. Here are the big ones we found repeated across DIY forums and plan comments:
- Using indoor screws. They rust and streak your wood. Buy exterior-rated, always.
- Skipping pre-drilling. Split boards near screw ends are the top rookie mistake.
- No seat slope. A slight backward tilt of the seat (about half an inch) drains water and feels better.
- Buying cushions first. Build the frame, then order cushions to fit exactly.
- Rushing the sealant. Wood needs to be dry before sealing, or moisture gets trapped inside.
Fixing these before final assembly takes minutes. Fixing them after? That’s a weekend project all over again.
Conclusion
Building your own patio sofa is one of those weekend projects that pays you back every time you sit down. Pick weather-resistant lumber, take your time on the cuts, seal it properly, and order cushions that actually fit. Skip the rookie mistakes we covered, like indoor screws and rushed sealing, and your build will outlast plenty of store-bought options. We researched dozens of plans and found the happiest DIYers all had one thing in common: they didn’t rush. So grab your lumber list, block out a weekend, and start cutting. Your porch is about to become everyone’s favorite seat in the house.
Frequently Asked Questions
Can I build a patio sofa without a miter saw?
Absolutely. A circular saw with a straightedge guide handles every cut in most plans. A simple hand saw works too, it just takes more elbow grease. Borrow or rent what you need rather than buying tools for one project.
How long will a DIY wood patio sofa last outside?
With cedar or redwood and proper sealing, you can reasonably expect 8 to 15 years of use. Pressure-treated pine lasts well too, but it needs more frequent resealing. Covers and seasonal storage stretch that lifespan even further.
Can I leave my DIY patio sofa outside year-round?
In mild climates, yes, as long as you keep it sealed and cover it between uses. In areas with freezing winters, store it in a shed or garage. Wood that stays wet through freeze-thaw cycles will crack and split over time.
What size should I build a patio sofa for two people?
Most two-seat plans run 48 to 60 inches wide, which gives each person comfortable room. Check your patio space first and leave at least 3 feet of walkway around the sofa. Build the frame before ordering cushions so everything fits exactly.
Do I need wood glue if I’m using screws?
Screws alone will hold, but exterior wood glue adds real strength at the joints and helps prevent wobble over time. We found most experienced builders use both. Just remember that glued joints are harder to disassemble if you ever need to fix a mistake.