How to Build a Wooden Outdoor Sofa: Complete DIY Guide
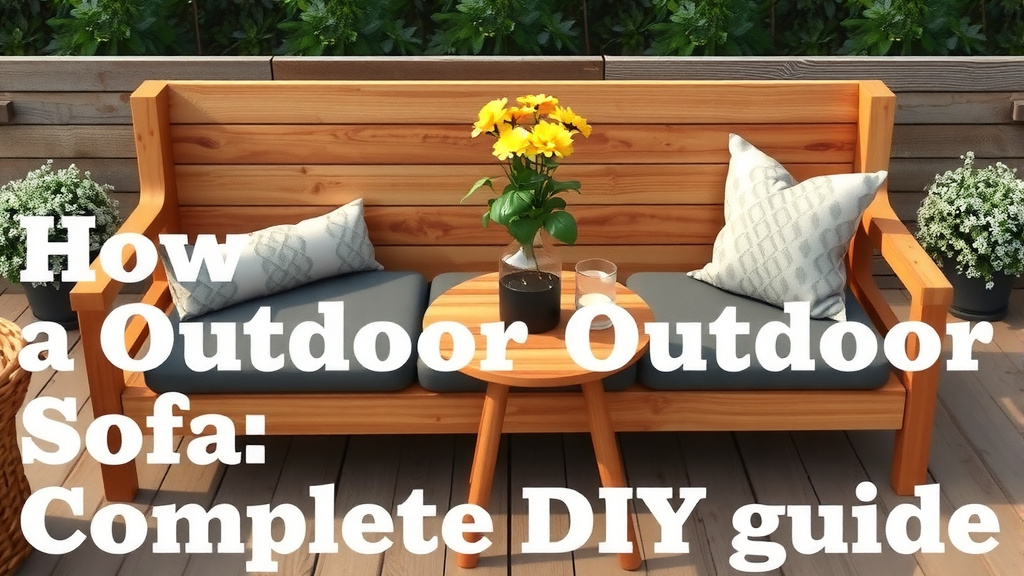
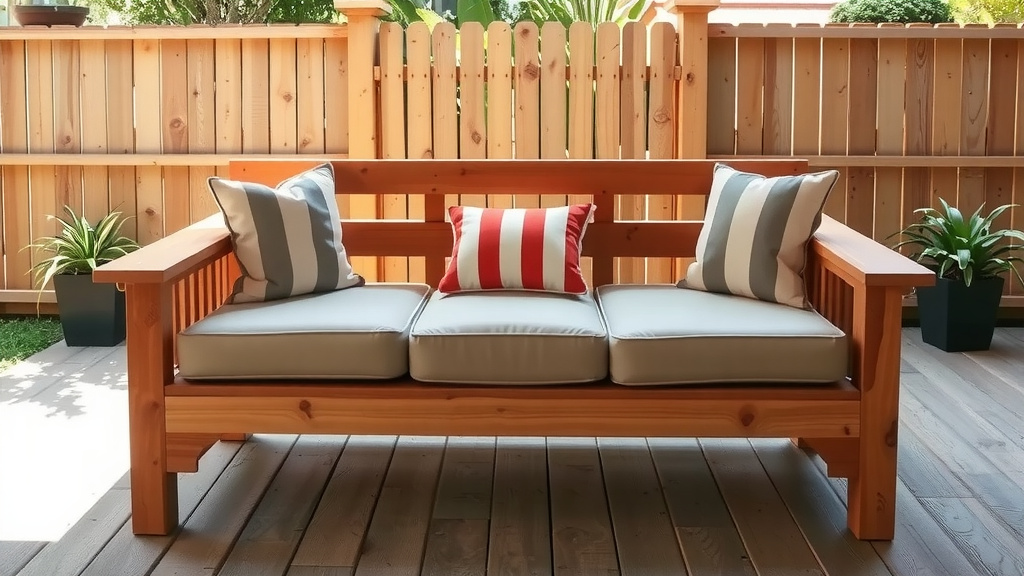
Building an outdoor sofa is simpler than you might think. The easiest way to build an outdoor sofa with wood is to start with cedar or pressure-treated lumber, cut your boards to size, and assemble the frame with wood screws and waterproof glue. Most DIYers finish a basic build in a weekend.
Why buy a $1,500 patio sofa when you can build one for a fraction of the cost? When we researched popular DIY outdoor furniture plans, we found that a solid 2×4-based design keeps things cheap and beginner-friendly. Many experts say cedar is a top pick because it naturally resists rot and bugs. Pretty sweet deal, right?
Here’s the quick version:
- Pick weather-resistant wood like cedar or pressure-treated pine
- Cut your boards based on a simple 2×4 sofa plan
- Build the base and back frame first, then add armrests
- Sand everything smooth and seal it with exterior-grade finish
- Add outdoor cushions and enjoy your handiwork
Below, we walk you through every step of building your own outdoor sofa, from picking the right lumber to the final coat of sealer. Grab your tape measure — let’s get building.
Building Your Own Wooden Outdoor Sofa Step by Step
The fastest path to a sturdy outdoor sofa is a 2×4 frame design with a slatted seat and back. We found that most plans follow the same basic order: build the base, add the back, then finish with arms and sanding. Follow the steps below and you’ll be sitting pretty by Sunday.
Step 1: Choose and Buy Your Lumber
Pick your wood before anything else. Cedar is the favorite because it fights off rot and insects on its own. Pressure-treated pine costs less but needs time to dry out before sealing.
For a standard six-foot sofa, we found most plans call for around eight to ten 2×4 boards. Buy one or two extra. Trust us — miscuts happen to everyone.
Wood Comparison at a Glance
| Wood Type | Cost | Durability | Best For |
|---|---|---|---|
| Cedar | $$$ | High | Beginners who want low upkeep |
| Pressure-treated pine | $ | High (if sealed) | Budget builds |
| Redwood | $$$$ | High | Premium look |
Step 2: Gather Your Tools
You don’t need a full workshop. Here’s the short list:
- Circular saw or miter saw
- Drill with driver bits
- Tape measure and speed square
- Sandpaper (80 and 120 grit)
- Exterior wood glue and 3-inch outdoor screws
Many hardware stores will cut your boards for free. Ask at the lumber desk. It saves you an hour of sawing.
Step 3: Cut Your Boards
Measure twice, cut once — the old rule still wins. A typical layout looks like this:
- Base rails: two boards at 72 inches
- Seat slats: six to eight boards at 24 inches
- Back posts: four boards cut to your desired height
- Armrests: two boards at 24 inches
Mark every cut line with a speed square so your edges stay square. Crooked cuts lead to wobbly sofas, and nobody wants a rocking chair masquerading as a couch.
Step 4: Assemble the Base Frame
Start with the two 72-inch rails. Attach cross supports between them every 16 inches or so. Use waterproof wood glue on every joint, then drive two screws through each connection.
Check for square by measuring diagonally corner to corner. If both diagonals match, your frame is square. If not, nudge it until they do.
Step 5: Build and Attach the Back
Lean the back at a slight angle, about 10 to 15 degrees, for comfort. Attach back posts to the rear of the base, then screw slats across them. Many experts say a reclined back is what separates a comfy sofa from a stiff park bench.
Space your slats about half an inch apart. Gaps let rain drain and help the wood dry faster.
Step 6: Add Armrests and Legs
Screw armrest boards on top of the side supports. Then attach four legs — or skip legs entirely and let the base sit low to the ground. Low profiles feel modern and resist tipping.
Step 7: Sand, Seal, and Protect
Sand every surface with 80-grit paper first, then finish with 120 grit. Rounded corners feel better and prevent splinters. Your future shorts-wearing guests will thank you.
Sealing is not optional. The CDC notes that moisture and mold thrive on untreated outdoor surfaces, so protect your work with an exterior-grade sealer or stain. Apply two coats and let each dry fully.
Step 8: Add Cushions and Style
Buy cushions labeled for outdoor use with quick-dry foam. Interior cushions will soak up rain like a sponge and grow mildew — a lesson many DIYers learn the hard way.
Final Weekend Checklist
- All screws driven flush, no sharp edges
- Every joint glued and secure
- Two coats of sealer applied and dry
- Cushions rated for outdoor use
- Sofa sits level on the ground
- Feet (or a pad) placed under legs to keep them off wet soil
Smart Tips to Make Your Sofa Last for Years
Build it once, then protect it well. We found that a few small habits make the biggest difference in how long your sofa survives.
Keep Water Away
Water is the enemy. Place your sofa on a paved or gravel surface, not bare dirt. Standing moisture wicks up into the legs and starts rot from the bottom.
Consider adding small furniture feet or rubber pads. They create a gap between wood and wet ground.
Reapply Sealer Every Year
Set a yearly reminder to wash your sofa with mild soap and water, let it dry, then roll on a fresh coat of sealer. Many manufacturers of exterior stains recommend this annual refresh to keep UV damage at bay.
Think of it like sunscreen for your sofa. Skip it, and the sun will gray out your beautiful cedar by summer’s end.
Store or Cover Cushions
Cushions last longest when brought inside or covered between uses. Mayo Clinic notes that damp environments encourage mold and mildew growth, which can trigger allergies. Dry cushions are healthy cushions.
And that’s really it. Cut carefully, glue every joint, seal it well, and your handcrafted sofa will outlast plenty of store-bought ones.
Conclusion
Building your own outdoor sofa comes down to a handful of smart choices. Pick cedar or sealed pressure-treated pine, keep every joint glued and screwed, angle the back for comfort, and finish with two coats of exterior sealer. Research and real-world DIY builds show that a simple 2×4 design holds up beautifully when you keep water away from the wood. You’ll save serious money, get exactly the size and style you want, and gain the confidence to tackle bigger projects later. Ready to start? Head to your local hardware store this weekend, ask the lumber desk to make your cuts, and begin with the base frame. Your patio is about to get a whole lot more inviting.
Frequently Asked Questions
How much does it cost to build a wooden outdoor sofa?
Most DIYers spend between $100 and $250 depending on the wood. Pressure-treated pine keeps you near the low end, while cedar runs higher. Add $40 to $80 if you need to buy a saw and drill for the first time.
Can I build an outdoor sofa without a saw?
Yes. Many hardware stores will cut your boards to size for free when you buy the lumber. Bring your cut list with you, and you can assemble the entire sofa with just a drill, a tape measure, and a speed square.
How long does a DIY wooden outdoor sofa last?
With annual resealing and good placement on a dry surface, a cedar sofa can easily last 10 years or more. Pressure-treated pine performs similarly when sealed each year. Neglecting the sealer is the fastest way to shorten its life.
What size should an outdoor sofa be?
A comfortable standard depth is 24 inches for the seat, with a seat height around 14 to 16 inches so cushions bring it to a natural sitting height. For length, plan on about 24 inches of width per person. Six feet comfortably seats three adults.
Can I leave my wooden outdoor sofa outside all year?
You can, but it will last longer with protection. A waterproof furniture cover or a covered porch makes a big difference through winter. If you live somewhere with heavy snow, storing the cushions indoors and covering the frame is your best bet.