How to Change a Leather Sofa Cover: Step-by-Step Guide
The easiest way to change a leather sofa cover is to measure your sofa, pick a cover made for your model, unzip the old one, and slide the new one over the cushions and frame. Most covers go on in under an hour. No special tools needed.
But there’s a catch. Not every sofa cover is removable, and not every replacement fits right. We researched dozens of sofa brands and cover options, and we found that checking your sofa’s design first saves you from a very frustrating afternoon. Some covers zip off easily. Others are stapled or glued to the frame, which changes everything.
Want to know if your sofa is a good candidate? Here’s the quick version:
- Check for zippers on the cushions and base — that’s your green light.
- Measure every part of your sofa before buying a replacement cover.
- Match the material — leather covers need proper care and the right fit.
- Work corner to corner when sliding the new cover on to avoid stretching.
- Condition the leather after fitting to keep it soft and crack-free.
Below, we break down exactly how to change your leather sofa cover step by step — from picking the right cover to getting it on without tearing anything. Let’s get your sofa looking fresh again.
Changing the Cover on Your Leather Sofa the Right Way
Start by confirming your cover is actually removable. Look for zippers or velcro along the base and cushions. If you find them, you’re in luck — this is a simple DIY job.
We found that most people skip this check and end up buying a cover that won’t fit. Don’t be that person. Ten seconds of peeking under your sofa saves an hour of regret.
Figure Out What Kind of Sofa You Have
Not all leather sofas are built the same. Some are designed with removable covers. Others have upholstery stapled tight to the frame, like a tattoo you can’t peel off.
Run your hand under the base. Feel for zipper tracks. Flip a cushion and check its underside. If everything is sewn shut, your sofa likely isn’t a candidate for cover swapping — and we’ll talk about your options later.
Loose Covers vs. Fitted Covers
There are two main types you’ll run into. Loose covers drape over the sofa and tuck in, like a bedsheet. Fitted covers zip around each cushion and the frame, like a wetsuit.
Fitted covers look cleaner, but they demand exact measurements. Loose covers forgive a little sloppiness. Many manufacturers offer both, so pick based on how picky you are about wrinkles.
Check for Zipper Tracks and Attachment Points
Before ordering anything, unzip one existing cover (if you have one) and study how it attaches. Note every zipper, velcro strip, and hook. Snap a few photos with your phone.
Those photos become your shopping guide. When a product page asks “which model do you have?” you’ll have answers instead of guesses.
Measure Your Sofa Before Buying a Replacement
Grab a soft tape measure and write down five numbers: total width, total depth, total height, cushion width, and cushion thickness. Measure the widest and tallest points, including arms and backrests. Our step-by-step guide to measuring sofa width shows exactly where to start and stop the tape.
Here’s a quick reference so you know what to record:
| Measurement | Where to Measure | Why It Matters |
|---|---|---|
| Width | Arm to arm, across the front | Determines cover size |
| Depth | Front edge to back of sofa | Prevents short covers |
| Height | Floor to top of backrest | Affects drape and fit |
| Cushion size | Each cushion, length and width | Needed for fitted covers |
| Arm style | Straight, rolled, or square | Shape changes how it sits |
Write these down somewhere you won’t lose them. A notes app works fine.
Picking the Right Leather Cover
Order from your sofa’s manufacturer first. Brands like IKEA and Lovesac sell replacement covers made for specific frames, and those fit like a glove. We found third-party covers work too, but read reviews for fit complaints before checkout.
Match the Leather Type and Color
Leather covers come in genuine leather, top-grain, and bonded leather. Bonded leather costs less but peels faster. Top-grain lasts longer and feels softer, according to many furniture guides.
Color matters too. A dark cover hides stains; a light one brightens a room. Pick what matches your life, not just your living room.
Don’t Forget a Backing Layer
Some covers include a thin fabric backing on the inside. This helps the cover slide on smoothly and protects the leather from friction. If you’re choosing between two options, take the one with backing. Your future self will thank you during installation.
Removing the Old Cover Without Damage
Clear the area around your sofa first. Then unzip everything slowly. Leather cracks when you yank it around sharp corners, so think of this step like unwrapping a gift you plan to regift — gentle and deliberate.
- Move the sofa away from the wall for full access.
- Remove cushions and set them aside.
- Unzip the base cover from back to front.
- Peel the cover off corner by corner, never by force.
- Vacuum the exposed frame while it’s bare.
Keep the old cover intact if it’s still in decent shape. It makes a handy spare or a template if you ever order custom.
Fitting the New Leather Cover Step by Step
Now the fun part. Lay the new cover flat and find its labels or tags — they tell you front from back. Mixing those up is the number one mistake we found in DIY forums.
Work Corner to Corner
Start at one back corner and work across. Drape the cover over the frame, then pull it down evenly on both sides. Alternate left and right so the leather stretches uniformly. Think of it like making a bed — you smooth one side, then the other.
Tuck, Zip, and Smooth
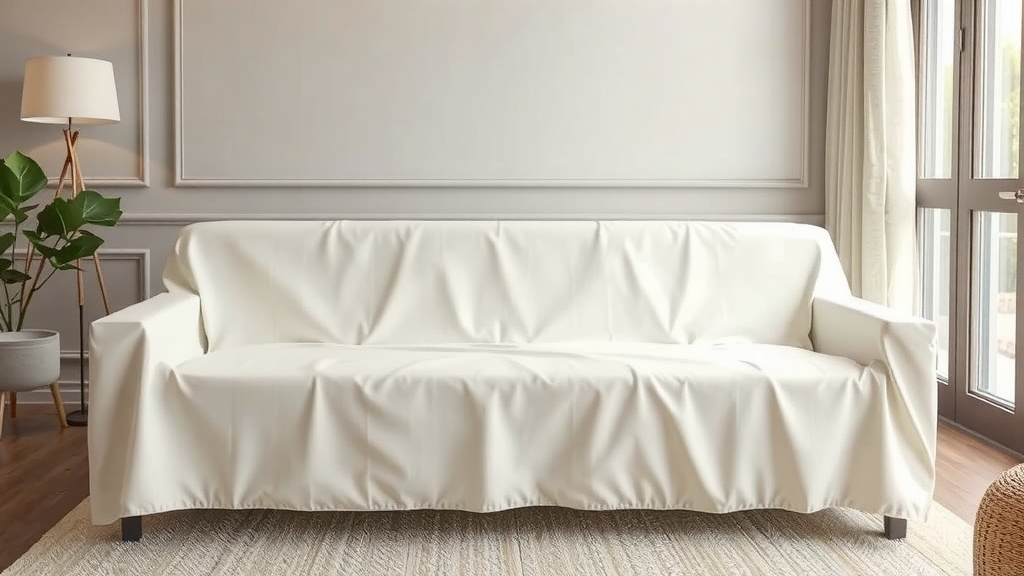
Once the body is on, wrap each cushion individually. Zip them shut, then place them back on the sofa. Run your palms over the surface to release wrinkles and settle the leather into its shape.
Squat down and check the base. Zip or velcro the bottom panel closed. If there’s extra fabric, tuck it into the gap between the seat and the armrests using a wooden spoon handle. Yes, really — it works.
Condition the Leather After Installation
New covers need moisture to stay supple. Many experts recommend conditioning leather a few days after fitting, using a pH-balanced leather conditioner (Cleveland Clinic notes gentle, fragrance-free products are kindest to skin that touches the surface). Apply a thin coat with a soft cloth, let it absorb, then buff.
Skip conditioners with silicone or wax. They feel nice for a week, then dry the leather out. A little care every six months keeps cracks away.
Your Pre-Installation Checklist
Before you start sliding anything on, run through this list. It takes two minutes and prevents most mishaps:
- Confirm zippers or velcro exist on the old cover.
- All five measurements written down and double-checked.
- New cover matches your sofa’s model and cushion count.
- Floor space cleared and cushions removed.
- Hands clean and jewelry off — rings snag leather.
- Leather conditioner ready for a few days later.
What If Your Sofa Cover Isn’t Removable?
If your upholstery is stapled or glued to the frame, don’t try to rip it off. You can damage the frame and waste a good cover. Your best options are a well-fitted loose slipcover on top, or a professional reupholsterer.
Reupholstering costs more, but it can give a quality frame a second life. We found many furniture pros suggest this route for solid-wood frames that are still sturdy. For cheaper frames, a slipcover is usually the smarter spend.
Common Mistakes to Avoid
A few errors show up again and again. Avoid these and your cover swap goes smoothly:
- Ordering by eye instead of by tape measure.
- Skipping the model number check on manufacturer sites.
- Forcing a cover onto cushions that are slightly too thick.
- Leaving wrinkles unchecked until they set into the leather.
- Conditioning too soon, before the cover settles into place.
Take your time. An unhurried hour beats a rushed mess every single time.
Conclusion
Changing a leather sofa cover is one of those jobs that sounds harder than it is. You check for zippers, take five measurements, order the right cover, and work it on corner by corner. That’s really the whole story. We found the people who struggle are the ones who skip the measuring step or force a cover that was never made for their frame. Slow down, follow the checklist, and give your new cover a few days to settle before you condition it. Your sofa will look refreshed, and you’ll have saved yourself hundreds compared to buying new. Now go peek under your sofa — those zippers are waiting.
Frequently Asked Questions
Can I wash a leather sofa cover in the washing machine?
No, most leather covers should never go in a washing machine. Water and agitation can crack, stiffen, or shrink the leather. Spot clean with a slightly damp cloth and a leather-safe cleaner instead, and check the care tag before trying anything else.
How much does a replacement leather sofa cover cost?
It depends heavily on the material and your sofa’s size. Bonded leather covers often run a few hundred dollars, while genuine or top-grain leather replacements can cost significantly more. We found manufacturer covers for popular models are usually priced between $200 and $800.
How often should I replace my leather sofa cover?
A quality leather cover can last 10 years or more with regular conditioning. Replace it when you see deep cracks, peeling, or stains that won’t clean out. If the leather just looks dull, conditioning and buffing may buy you several more years.
Can I get a custom leather cover made for an odd-shaped sofa?
Yes, several companies make custom covers based on measurements you submit. Expect to pay more than off-the-shelf options and wait a few weeks for production. Send exact photos and measurements, and ask for a fit guarantee before you commit.
Will a new leather cover smell weird at first?
Some new covers have a mild leather or factory smell that fades within a few days. Air out the room and let the cover breathe with the windows open. If the smell lingers past a week, wipe the surface with a dry cloth and condition it lightly.