How to Build an Outdoor Sofa: Step-by-Step DIY Guide
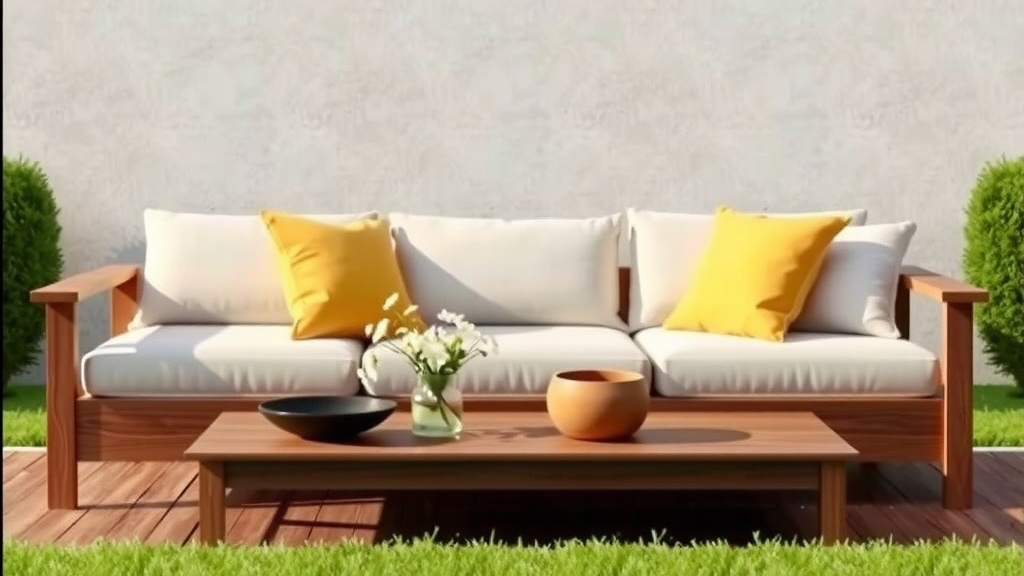
The easiest way to build an outdoor sofa is to start with a simple frame made of cedar or pressure-treated lumber, secure it with exterior wood screws, then add a weatherproof seat base and outdoor cushions. Most DIYers can finish a basic version in a single weekend with just a saw, drill, and tape measure. Yes, really—one weekend.
We researched dozens of DIY plans and found that cost is the biggest win. A store-bought patio sofa often runs $800 or more, while a homemade one can come in under $200. You also get to pick the exact size, wood, and cushions that fit your space. Want a corner L-shape or a chunky modern look? You decide.
- Most builds take one to two days, depending on your skill level.
- Cedar, redwood, and pressure-treated pine are the best wood choices.
- You’ll need basic tools: a drill, saw, tape measure, and level.
- Budget around $100–$200 for lumber, screws, and cushions.
- Always use exterior-grade materials so your sofa survives the weather.
Below, we break down everything you need to know, from picking lumber to adding the final cushions. Grab your coffee (and maybe a friend), and let’s get building.
Building Your Own Outdoor Sofa Step by Step
The build comes down to four stages: plan, cut, assemble, and finish. Do them in that order and you’ll skip most of the headaches first-timers run into. Let’s walk through each one.
Step 1: Plan Your Size and Style
Measure your patio space before anything else. A standard outdoor sofa runs about 72 to 80 inches wide and 30 to 35 inches deep. Write your numbers down. Trust us—your future self will thank you.
Decide if you want an open-frame modern look or a chunkier farmhouse style. We found that simple open-frame builds are the most forgiving for beginners. Fewer pieces means fewer chances to measure wrong.
Pick Your Cushions First
Here’s a trick many builders miss: shop for cushions before you cut wood. Cushion sizes aren’t standard, so building around what you can actually buy saves you a world of frustration. Order them early so they arrive while you build.
Step 2: Gather Your Lumber and Tools
Head to the hardware store with your cut list. Most lumber yards and big-box stores will make straight cuts for free, which is a huge time-saver if you don’t own a saw.
- Cedar or redwood boards for the frame (naturally weather-resistant)
- Pressure-treated 2x4s or 2x6s for the budget option
- Three-inch exterior wood screws (stainless or coated)
- Wood glue rated for outdoor use
- One-by-four boards for slats or seat supports
Step 3: Cut Your Pieces
Cut everything before assembly. Label each piece with a pencil—it feels fussy, but it prevents that “wait, which one is this?” moment mid-build. Double-check each measurement twice. The old rule holds: measure twice, cut once.
Step 4: Assemble the Frame
Build the two side panels first, then connect them with the front and back rails. Pre-drill your screw holes so the wood doesn’t split. Use a level on every surface as you go. A wobbly sofa is nobody’s friend.
Add the seat slats or supports last. Space them about half an inch apart so water drains and air flows underneath the cushions.
Choosing the Best Wood for an Outdoor Sofa
Your wood choice decides how long your sofa lives outside. We found three options cover almost every budget and skill level.
| Wood Type | Avg. Cost | Durability | Best For |
|---|---|---|---|
| Cedar | $$ | 10+ years | Great all-around pick |
| Redwood | $$$ | 15+ years | Wet climates |
| Pressure-treated pine | $ | 10+ years | Tight budgets |
Cedar smells amazing and resists rot on its own. Pressure-treated pine is cheap but needs a good sealant. Whatever you pick, look for boards that are straight and dry—warped lumber will fight you the whole build.
Should You Use Pressure-Treated Wood?
Yes, if budget matters most. Just know that modern treated lumber can be damp and heavy at the store. Let it dry out for a few weeks before staining or sealing. Many experts say treated wood also needs galvanized or coated screws, since regular screws corrode against the treatment.
Tools You’ll Need (and What You Can Skip)
Here’s the honest list. You need four tools; everything else is nice-to-have.
- Drill/driver – your workhorse for every screw
- Circular saw or miter saw – unless the store cuts for you
- Tape measure – non-negotiable
- Level – keeps your seat from doing the lean
A speed square, clamps, and sandpaper make life easier but can wait. Borrow before you buy. Most of us know a neighbor with a saw collecting dust in the garage.
Weatherproofing Your Sofa So It Lasts
This is the step people skip, then regret. Untreated outdoor furniture fades, cracks, and rots within a couple of seasons. A little protection goes a long way.
Sanding and Sealing
Sand all surfaces with 120-grit paper, then wipe off the dust. Apply two coats of exterior sealant or spar urethane. Many woodworking guides recommend reapplying a coat every year or two—it’s a 30-minute job that adds years of life.
Stain vs. Paint vs. Clear Sealant
Stain soaks in and shows wood grain. Paint gives full color coverage but can peel. Clear sealant keeps the natural look. If you’re unsure, grab a sample size of stain and test it on a scrap board first.
Protecting Cushions and Fabric
Only buy cushions labeled outdoor or all-weather. They use quick-dry foam and mildew-resistant fabric. Store them in a deck box or bring them inside during heavy rain. Cheap indoor cushions turn into science experiments—don’t ask how we know.
Common Mistakes to Avoid
We found these trip up first-time builders the most. A few minutes of awareness saves hours of redoing.
- Screwing into untreated indoor wood by accident
- Skipping pre-drill holes and splitting your boards
- Building around “standard” cushion sizes that don’t exist
- Forgetting to check the frame with a level
- Leaving the sofa flat on the ground where water pools
- Sealing before sanding (it locks in rough spots)

Safety Tips for Your Build Day
Power tools and sawdust deserve respect. Wear safety glasses when cutting, and keep fingers well clear of blades. The CDC notes that tens of thousands of DIY injuries happen each year from home tool use, so slow down and stay focused. Work in a clear space, and if a cut feels sketchy, stop and rethink it. The sofa can wait an extra hour.
Quick Pre-Build Checklist
Run through this list before you make the first cut. It takes two minutes and prevents the classic mid-build hardware store run.
- Space measured and sofa dimensions written down
- Cushions ordered or sized
- Complete lumber cut list in hand
- Exterior screws and wood glue purchased
- Drill charged and saw blade sharp
- Sealant and sandpaper ready for finishing day
Budget Breakdown: What You’ll Actually Spend
Wondering where your money goes? Here’s a realistic look for a standard six-foot sofa.
| Item | Typical Cost |
|---|---|
| Lumber | $50–$90 |
| Screws, glue, and hardware | $15–$25 |
| Sealant or stain | $20–$30 |
| Outdoor cushions (set) | $40–$100 |
That lands most builds between $125 and $245 total. Compare that to $800-plus at a patio store and the math speaks for itself. Your first build pays for the tools you’ll use on every project after it.
Conclusion
Building your own outdoor sofa is one of those projects that looks harder than it is. You pick your wood, order cushions first, cut everything carefully, and seal it well. Do that, and you’ll end up with furniture that fits your space and costs a fraction of what stores charge. We researched dozens of plans, and the pattern is clear: careful planning beats fancy tools every time. Even a first-timer can knock this out in a weekend. So here’s your next step—measure your patio space today and write down your dimensions. Then grab your cut list and head to the hardware store. Your future self, relaxing on a sofa you built, will be glad you did.
Frequently Asked Questions
Can I build an outdoor sofa without any woodworking experience?
Yes, and many first-timers do. A simple open-frame design only requires straight cuts and screws, nothing fancy. Start with a basic rectangular frame before attempting L-shapes or angled backs. If the hardware store cuts your lumber for free, the project gets even easier.
How do I keep my outdoor sofa from wobbling on a patio?
Check the ground where the sofa will sit and use patio pavers or adjustable furniture feet if it’s uneven. During assembly, check every panel with a level before driving the final screws. Adding diagonal corner braces inside the frame also stiffens things up considerably.
Should I anchor my outdoor sofa to the ground?
In most cases, no—a well-built sofa is heavy enough to stay put. If you live somewhere with strong winds or storms, you can bracket it to a deck surface or tuck it against a wall. Cushions are the first thing to blow away, so store those indoors.
How long does pressure-treated wood need to dry before sealing?
Typically two to four weeks, depending on your climate and how damp the boards were at the store. A simple test: sprinkle water on the wood. If it beads up, wait longer; if it soaks in, you’re ready to seal.
Can I leave my DIY outdoor sofa outside all year?
The frame can stay out if it’s sealed properly and kept off wet ground, but cushions should come inside for winter. In snowy regions, a furniture cover or tarp adds extra protection for the frame. A little seasonal care can add years to your build.